The Sweet Spot
Sunday, February 17, 2013
Classic Vanilla Cake with Buttercream Icing
This cake will absolutely blow your mind. Just last night I discovered Sweetapolita, and it quickly because my favorite baking blog. After reading every page of her blog this afternoon, I decided to try a recipe out for myself. I whipped up her Classic Vanilla Birthday Cake and used her Pastel Swirl Cake Tutorial to make this delicious stack of amazingness.
I used 6 inch pans since a friend was borrowing my 8 inch and I ended up with the tallest little cake I've ever seen! It probably would have been easier to smooth the edges if the cake has been shorter, so I will certainly try this technique again in the future!
Monday, February 4, 2013
Chocolate Cake with Cream Cheese Filling and Chocolate Buttercream Icing
rich. Rich. RICH! That's exactly what this cake is. I wanted to make a chocolately-sweet dessert for a Superbowl party I attended last night and this was just the ticket. I tried out a new chocolate cake recipe and didn't have a whole lot of success.
The first two layers weren't quite done enough and the third was too done! I was able to salvage one of these layers and then resorted to my tried and true devil's food cake recipe for the rest.
I kind of like the two-tone chocolate look! The failed chocolate cake recipe tasted delicious so I am most definitely going to try to master it again at some point, but until I do, I will just leave you with my go-to chocolate cake recipe courtesy of The Cake Mix Doctor! I also adjusted the icing recipes to match that of a 2-layer cake. The cream cheese icing recipe is from my recipe book and the chocolate buttercream icing is by Savory Sweet Life. Happy baking!
Ingredients:
for the cake--
1 package plain devil's food cake mix
3 tablespoons unsweetened cocoa powder
1 1/3 cup buttermilk
1/2 cup vegetable oil
3 large eggs
1 teaspoon pure vanilla extract
for the cream cheese filling--
1 8-ounce packages of cream cheese, at room temperature
1/2 stick of unsalted butter, at room temperature
1 cups confectioners' sugar
1/2 teaspoon pure vanilla extract
for the chocolate buttercream icing--
2 sticks unsalted butter, at room temperature
3 1/2 cups confectioners' sugar
1/2 cup unsweetened cocoa powder
1/2 teaspoon salt
2 teaspoons vanilla extract
4 tablespoons milk
garnish (optional)--
Ghiradelli white chocolate baking bar
Instructions:
for the cake--
Place a rack in the center of the oven and preheat to 350 degrees. Grease and flour 2 8-inch round cake pans.
In a large bowl, combine the cake mix, cocoa powder, buttermilk, oil, eggs, and vanilla and blend with an electric mixer until well combined. Divide the batter evenly between the pans and bake until the cakes spring back when touched lightly with your fingers--about 28-30 minutes Cool on a wire rack for 10 minutes, then release the cakes from the pans to cool completely. **I think it's easier to level cake layers while they are warm so do this sometime during the cooling process using a sharp serrated knife.
for the cream cheese filling--
Cream together the cream cheese and butter in a stand mixer with a paddle attachment. Slowly add the confectioners' sugar and mix well. Add the vanilla and continue to mix for about 5 minutes.
for the chocolate buttercream icing--
Cream the butter in a stand mixer with a paddle attachment. Slowly add the confectioners' sugar and cocoa powder in half cup intervals with the mixer on low. When these ingredients are well combined, add the vanilla extract, salt, and milk. Increase the speed to medium-high and beat for 3 minutes. (You can add more milk if you want a thinner consistency.)
assembly--
Place the first cake layer upside down on a cardboard cake round. Evenly spread the cream cheese mixture on top. Place the second layer upside down on top of this. Generously ice the entire cake with the chocolate buttercream icing. Use a vegetable peeler to make the white chocolate shavings and garnish to your heart's content!
Thursday, January 31, 2013
Cinnamon Coffee Cake with Powdered Sugar Glaze
Today I made the best coffee cake I've ever tasted in my whole entire existence. For real! I'm not trying to brag, but this was down right tasty. The idea sparked when a great friend of mine sent me a beautiful Nordicware Bundt Pan for my birthday. If you're looking for a pan that more than lives up to all of it's claims, look no further! Eat cake for breakfast!
Ingredients
for the cake--
1 cup sour cream
3/4 cup unsalted butter
1.5 cups white sugar
2.5 cups all-purpose flour
1 teaspoon baking soda
1 teaspoon baking powder
1 teaspoon vanilla extract
3 large eggs
1 tablespoon cinnamon
1/4 cup light brown sugar
for the glaze--
1 cup confectioners' sugar
1-2 tablespoons milk
Directions:
for the cake--
Preheat oven to 400 degrees. Lightly grease a bundt pan with Bakers Joy
In a stand mixer, combine sugar and eggs until well combined. Cream in the sour cream and butter. Add the flour, baking soda, baking powder, and vanilla and mix well.
In a small bowl, combine 1/4 cup brown sugar with the cinnamon, set aside.
Pour half of the cake batter into the bundt pan. Top with the cinnamon sugar mixture then pour the remaining cake batter on top of this. Using a butterknife, make swirl designs around the batter.
Bake at 400 for 8 minutes, then lower the heat to 350 degrees and bake an addition 40 minutes.
for the glaze--
In a small bowl, stir together the confectioners sugar and milk.
While the cake is cooling on a wire rack, place a large plate below it. Generously pour the glaze over the entire cake. When it stops dripping, scrap the remaining glaze on the plate back into the bowl and repeat as many times as needed.
Serve warm.
Tuesday, January 1, 2013
HAPPY NEW YEAR!!!
Welcome to 2013 everyone!!! I spent last night ringing in the new year with my best dental school friends over lots of snacks and a little champagne! I baked this super easy but very festive 'fun-fetti' cake with buttercream icing for the occasion!
I chose to use a boxed cake mix (cheap!) because they are guaranteed to taste great--which isn't always the case with homemade recipes. I've learned that the hard way! When making layer cakes I think it's best to allow yourself at least 2 days of working time. I baked this cake on Saturday and froze each layer, wrapped in Saran wrap and placed in a Ziploc bag, after leveling and cooling to room temp. I never make icing until right before I'm going to use it, but it is much easier to do you crumb coat on a frozen cake!
Happy baking!
Ingredients:
for the cake--
1 box of Duncan Hines Classic White cake mix
3 large egg whites, at room temperature
1 cup water
1/4 cup vegetable oil
1/2 tsp vanilla extract
1/2 tsp butter extract
1/4 cup jimmie sprinkles
for the icing--
1.5 sticks of unsalted butter
4.5 cups confectioners' sugar
1.5 tsp vanilla extract
3 tablespoons heavy whipping cream
Directions:
for the cake--
Preheat the oven to 350 degrees. Line the bottoms of 2 8-inch cake pans with parchment paper. Grease and flour these pans and set aside.
In a large bowl combine all of the cake ingredients except the sprinkles and mix until well combined, about 3 minutes. Gently fold in the sprinkles using a spatula. Evenly disperse the batter between the 2 pans and bake for about 26 minutes. Check doneness by gently pressing on the center of the cake, it should spring back a little!
Place the cakes in their pans on a wire rack and allow to cool for 15 minutes. Then remove the cakes from the pans and continue to cool completely. Once cooled, level the cakes and wrap them in 2 sheets of Saran wrap and place in a Ziploc bag to freeze overnight.
for the icing--
When you're ready to make the icing, combine the butter and sugar in a stand mixer and beat on medium high for about 3 minutes. Slowly add the vanilla and heavy whipping cream and beat for an additional 3 minutes. If you want to decorate the cake like I did, set 1 cup of icing aside and mix with your desired food coloring.
to decorate--
Remove the frozen cakes and place on an appropriately sized cake cardboard on a rotating cake stand sitting on top of a cookie sheet. Place the first layer upside down and ice the top before placing the second layer upside down on top of that. Begin by icing the the sides of the cake and then press handfuls of sprinkles into the sides (this is where the cookie sheet comes in handy). Carefully ice the top of the cake, add sprinkles to the top of the cake if desired, and use a #3 top to write something fitting for the occasion. Use a #21 tip and your colored icing to pipe borders on the top and bottom.
"In the New Year, may your right hand always be
stretched out in friendship, never in want."
Sunday, December 16, 2012
Banana Bread
Banana bread is one of my favorite treats and after trying a handful of recipes, I have finally found a keeper! I made a half batch of this recipe (because I only had 3 bananas on hand) and I was quite pleased with the results. I’m convinced that no matter what the recipe or how spectacular the pan is, all breads end up a little bit dry on the bottom and a touch too soft at the top. Halving the recipe** solved this problem!
I don’t have any pictures to share because a half loaf of bread isn’t the best looking thing I’ve ever baked, but what it lacks in looks it makes up for in deliciousness!! Try it out for yourself!
Ingredients:
1¾ cups unbleached all-purpose flour
1 teaspoon baking soda
½ teaspoon salt
6 large very ripe bananas, peeled
8 tablespoons unsalted butter, melted and cooled slightly
2 large eggs
¾ cup packed light brown sugar
1 teaspoon vanilla extract
2 teaspoons granulated sugar
1 teaspoon baking soda
½ teaspoon salt
6 large very ripe bananas, peeled
8 tablespoons unsalted butter, melted and cooled slightly
2 large eggs
¾ cup packed light brown sugar
1 teaspoon vanilla extract
2 teaspoons granulated sugar
Directions:
Place 5 of the bananas in a microwave-safe bowl covered with plastic wrap. Cut several steam vents in the plastic. Microwave on high for about 5 minutes or until the bananas are soft and have released liquid. Transfer the bananas to a strainer placed over a medium sauce pan and allow to drain, stirring occasionally, for 15 minutes.
Meanwhile, you can position an oven rack in the middle position and preheat the oven to 350 degrees. Grease and flour an 8½ by 4½-inch loaf pan. In a large bowl, stir together the flour, baking soda, and salt. Set aside.
When the bananas are finished draining, remove the strainer and turn the stove top to medium high, allowing the liquids to reduce to about 1/4 cup (about 5 minutes). Remove the pan from the heat, stir the reduced liquid into the bananas, and mash with a potato masher until fairly smooth. Whisk in the melted butter, eggs, brown sugar, and vanilla.
Pour the banana mixture into the flour mixture and stir until just combined. Pour the batter into the prepared pan. Slice the remaining banana diagonallyinto ¼-inch-thick slices and lay them, overlapping, on either side of the pan. There should be a 1-2 inch wide space down the center to ensure an even rise. Sprinkle the granulated sugar evenly over loaf.
Bake for 55-75 minutes, use the toothpick test to determine doneness. Cool the bread in the pan on a wire rack for 15 minutes, then remove the loaf from the pan and continue to cool on a wire rack.
**As a general rule, if you halve all the ingredients in the recipe, you can usually halve all of the cook times as well. I microwaved the banana mixture for 2.5 minutes, reduced the liquid for about 6 minutes, and baked the bread for 30 minutes and it turned out perfectly!
Saturday, December 15, 2012
Comfort Food
This is the perfect cold weather, long day, eat-it-on-the-couch-in-your-PJ's kinda soup!
VEGETABLE TORTELLINI SOUP (adapted from Spoonful)
Ingredients:
- 2 tablespoons olive oil
- 1 medium onion, chopped
- 1 small zucchini, diced
- 1 cup shredded carrots
- 5 1/2 cups vegetable broth
- 1 teaspoon dried basil (more if fresh)
- 1 bay leaf
- 1 cup canned crushed tomatoes
- 1/2 teaspoon salt
- 8 to 9 ounces fresh cheese filled tortellini
- 2 to 3 tablespoons chopped (fresh) parsley
- Black pepper, to taste
Directions:
In a large pot, heat olive oil over medium heat. Add the onion, zucchini, and carrot and saute for 8 to 10 minutes, stirring often.
Add the vegetable stock, basil, bay leaf, tomatoes, and salt. Increase the heat and bring the mixture to a low boil. Add the tortellini and continue to cook soup for about 10-12 minutes more. Gently stir in the parsley and pepper during the last few minutes.
Friday, December 14, 2012
Italian-ish Feast!
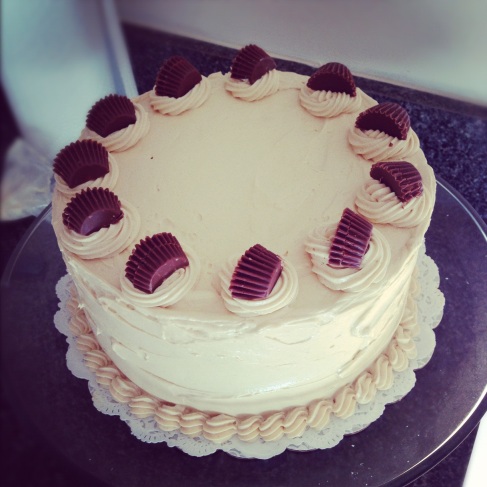
I am a part of what one might call a "dinner club." A few times a year a group of roommates take turns preparing a dinner for another group of roommates. Last night it was our turn to prepare the spread! Lauren I came up with a pretty stellar menu consisting of penne pasta with chicken and vodka sauce, garlic bread, apple cashew salad, and a chocolate cake with peanut butter mousse icing!
The cake was inspired by Annie's Eats (I'm sure you're surprised by this)!
I followed the recipe exactly, except I used Maxwell instant coffee instead of espresso powder.
CHOCOLATE PEANUT BUTTER LAYER CAKE by Annie's Eats
Ingredients--
For the cake:
1¾ cups plus 2 tbsp. all-purpose flour
1½ cups unsweetened cocoa powder, plus more for dusting the pans
1 tbsp. instant espresso or coffee powder
1½ cups boiling water
¾ cup sour cream
1 tbsp. vanilla extract
3 sticks unsalted butter, at room temperature
2½ cups plus 2 tbsp. sugar
3 large eggs, at room temperature
1¼ tsp. baking soda
¾ tsp. salt
For the filling and frosting:
¾ cup heavy cream, chilled
3¼ cups confectioners’ sugar, sifted, divided
3 sticks unsalted butter, at room temperature
1 cup creamy peanut butter
1 tbsp. vanilla extract
Pinch of coarse salt
¾ cup heavy cream, chilled
3¼ cups confectioners’ sugar, sifted, divided
3 sticks unsalted butter, at room temperature
1 cup creamy peanut butter
1 tbsp. vanilla extract
Pinch of coarse salt
To garnish:Mini peanut butter cups, halved
DIRECTIONS:
- Start by preparing 3 8-inch round cake pans. Trace the bottoms of the pans onto parchment paper and cut slightly inside this line. Using some Crisco on a paper towel, grease the sides of the pan, place the parchment paper circle in the bottom of the pan and grease that as well. Sprinkle some cocoa powder on top and shake it around the pan so there is a small dusting covering the grease; dump out any excess.
- Preheat the oven to 350 degrees.
- Bring a small pot filled with water to a rapid boil. While you're waiting on the water to boil, in a medium bowl, combine the cocoa powder and espresso powder. Once boiling, add the water to this and whisk until smooth. Set aside to cool for about 3-5 minutes, then whisk in the sour cream and vanilla. Set aside.
- In the bowl of an electric mixer, beat the butter on medium-high speed until there are no lumps. Add the sugar and continue to beat for 2-3 minutes. Add eggs one at a time, smoothing down the sides of the bowl as needed.
- In a medium bowl, combine the flour, baking soda, and salt.
- Reduce the speed of the mixer to low and add one third of the dry ingredient mixture with one third of the wet mixture. Repeat until all ingredients are combined in a homogenous mixture.
- Divide the batter evening among the prepared pans and bake for 30 minutes, rotating halfway through.
- Transfer the baked cakes to a wire rack for about 10 minutes. **I like to flash freeze layer cakes so they are easier to ice--to do this you can place a wire rack in your freezer and put the entire cake and pan, uncovered in the freezer for 15 minutes. At this time you can remove the cakes from the pans and wrap in 2 layers of Saran wrap before putting the cakes back in the freezer for at least an hour before icing.
- To make the frosting, combine the heavy cream and ¼ cup of the confectioners’ sugar in a medium bowl using a hand mixer on medium-high. Whip until light, fluffy, and stiff peaks form.
- Next, combine the butter and peanut butter in the bowl of an electric mixer and beat on medium-high for about a minute. Add the confectioners’ sugar to the bowl and mix in until it's well incorporated. Blend in the vanilla extract and salt, and continue to whip on high speed until very fluffy, about 4-5 minutes, scraping down the sides of the bowl as needed.
- Use a large spatula to gently fold the whipped cream mixture into the frosting.
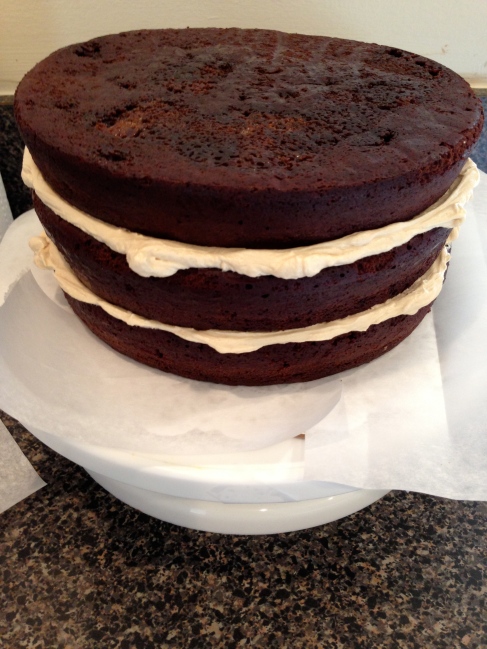
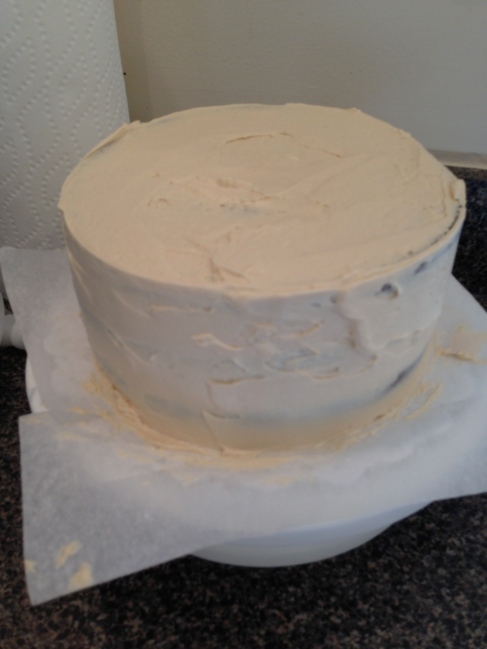
- To assemble the cake, arrange a cake board (edges lined with wax paper) on a rotating cake stand. Place one of the frozen cake layers on the board and add a thick layer of frosting to the top only. Do the same thing for the next two layers. Once the layers are assembled you can frost your crumb coat and then place the cake in the refrigerator for an hour.
- After an hour, remove the cake and finish icing. You can try to get the icing as smooth as possible or leave it with a kind of wavy finish! I used a Wilton #21 tip to pipe a shell border and evenly placed swirls on top. Place a half of a mini Reese's cup in each swirl (freeze these for an hour before halving)!
The dinner party was a smashing success!!! Guests brought wine (some was homemade!), fine cheeses and crackers, and tomato and mozz balsmaic skewers!! It was a night full of friends, happiness, and good eats! I'll 'cheers' to that any night!
BROCCOMOLE!
Guacamole has to be one of my favorite snacks! I know avocados are well loved by many and have an excellent reputation for lowering cholesterol, controlling blood pressure, regulating blood sugar levels, fighting free-radicals, and making your skin look healthy and vibrant. They contain monounsaturated fats, which are the good kind of fat. But it's still fat! Which means you can't be eating a whole gaucamole filled bowl made from four mashed up avocados and say you're preventing heart disease. Like all delicious things in life, moderation is key!
There are a few instances when the moderation card can be thrown out the window, and one of those is broccoli! So what can broccoli do for us, you ask?
1. Assists your body's detoxification system!
2. Anti-inflammatory nutrients (flavenoids) help combat allergies and inflammation
3. Vitamins A & K help balance the body's metabolism of vitamin D, which assists the calcium absorption, which leads to strong bones!
4. Fiber for healthy digestion, lowering cholesterol, and maintaing low sugar levels
5. Carotenoids improve eye health
6. Glucoraphanin for healthy skin!
7. Potassium to lower blood pressure
8. Vitamin C to protect against colds!
9. High in protein, low in calories!
10. Lutein to prevent thickening of arteries, which prevents heart disease!
Bottom line: broccoli is a food you should be eating everyday! This recipe will make it easy to enjoy!
BROCCOMOLE (adapted from Domestic Fits)
Ingredients:
- 1 large head of broccoli, chopped
- 1 jalapeno pepper, chopped, seeds removed
- 2 green onions, chopped
- 1 tsp olive oil
- 2 oz. 1/3 less fast cream cheese
- 1 tbs cilantro
- 1/4 tsp salt
- 1/4 tsp black pepper
- Sun-dried tomatoes (optional)
Instructions:
- Overcook broccoli in lightly salted water. It should be pretty mushy when it's finished.
- Thoroughly drain the broccoli in a strainer. Try to get as much water off as possible!
- Combine the cooked broccoli and all of the other ingredients in a food processor. Blend until smooth.
- Serve warm with your favorite tortilla chips!
Wednesday, December 12, 2012
Baking: REWIND
It has been quite a while since my last post, and while I haven't been baking as much as I would have liked to, I HAVE been whipping up a few goodies! Here are two cookie recipes from October! Enjoy!


I baked these in October to help raise money for the Stefanie Spielman Fund for Breast Cancer Research.
If you're ever looking for a killer bake sale treat, look no further than Annie's Eats! This woman is an absolute genius in the kitchen. If you're a fan of those deliciously soft sugar cookies you purchase by the dozen at a grocery store, you will LOVE these! I made this recipe exactly as listed and my cookies were the first item to sell out!
SOFT FROSTED SUGAR COOKIES by Annie's Eats
Ingredients:
For the cookies:
4½ cups all-purpose flour
4½ tsp. baking powder
¾ tsp. salt
1½ cups (3 sticks) unsalted butter, at room temperature
1½ cups sugar
3 large eggs
5 tsp. vanilla extract
4½ cups all-purpose flour
4½ tsp. baking powder
¾ tsp. salt
1½ cups (3 sticks) unsalted butter, at room temperature
1½ cups sugar
3 large eggs
5 tsp. vanilla extract
For the frosting:
5 cups confectioners’ sugar, sifted
1/3 cup (5 1/3 tbsp.) unsalted butter, melted
1 tbsp. vanilla extract
7-8 tbsp. milk (plus more, as needed)
Food coloring (optional)
Sprinkles (optional)
5 cups confectioners’ sugar, sifted
1/3 cup (5 1/3 tbsp.) unsalted butter, melted
1 tbsp. vanilla extract
7-8 tbsp. milk (plus more, as needed)
Food coloring (optional)
Sprinkles (optional)
Directions:
In a large bowl combine the flour, baking powder, and salt. In the bowl of your electric mixer, beat the butter and sugar well, adding one egg at a time followed by the vanilla. Continue to mix these ingredients on medium-high for about two minutes more.
Slowly add the dry ingredients to the wet and mix until well combined. Cover and refrigerate for at least one hour.
When ready to bake, preheat the oven to 350 degrees. On a cookie sheet lined with parchment paper, roll 1/4 cup ball of dough and flatten slightly on the tray leaving about two inches between each cookie. Bake for 10 minutes.
To make the icing, place all the ingredients in your stand mixer and mix until well combined and creamy. Ice the cookies when they are cool and add your choice of sprinkles!
______________________________________________________
Towards the end of October I set out to master rolled sugar cookies, a feat which I have never taken on before! Baking the cookies was the easy part. Decorating the cookies was a whole different story. I have never used royal icing before as I have been using my grandmother's unbelievable buttercream icing recipe since I started baking.
If you have a lot of time on your hands and you're up for a challenge I suggest giving rolled sugar cookies a go! They are a fun and creative way to practice your decorating skills. I am certain it will get easier for me each time I make them.

The ROLLED SUGAR COOKIE recipe I used can be found here. The recipe says it will make 5 dozen cookies, but I only managed to get 3 dozen using Wilton comfort grip cookie cutters in the circle and pumpkin shapes!
I recommend letting your cookie dough sit in the refrigerator overnight. This will make your cookie cutting so much easier!

When you're ready to roll, sprinkle flour over a clean counter or cutting board. Place your chilled dough on top of the flour and sprinkle more flour on top of it. Place a piece of wax paper over the dough and roll with a rolling pin until dough is about 1/4-1/2" thick.
Cut out your cookies and place them on a cookie sheet. I like to bake 6 cookies per sheet at a time. DO NOT over bake! Your first batch will probably be a test run. You don't want any brown edges or bottoms on these guys!
When it's time to ice your cookies, I recommend this ROYAL ICING recipe by Bake at 350. In fact, I recommend Bake at 350 for all of your sugar cookie decorating needs. Bridget is unbelievably talented and her blog features hundreds of sugar cookie decorating ideas with step by step photo instruction!
Here is the finished product! I followed this photo demo and was pretty darn pleased with the results!

Subscribe to:
Posts (Atom)


